Plumbing issues have a unique way of turning a quiet afternoon into an expensive disaster. A slow drip under the bathroom vanity, a faint whistling noise inside the utility closet, or a shower drain that slowly pools around your ankles might seem like minor inconveniences at first. However, left unaddressed, these small warnings often escalate into burst pipes, toxic mold infestations, or severe structural water damage. The financial toll of emergency water restoration can quickly run into thousands of dollars, making proactive system upkeep one of the smartest investments a homeowner can make.
The good news is that keeping your home’s water supply and drainage systems running smoothly does not require an advanced technical degree or an unlimited budget. By taking a proactive, hands-on approach to routine inspections and learning basic preventative techniques, you can eliminate the vast majority of common household issues before they require urgent intervention. Even better, establishing an organized maintenance routine allows you to manage costs predictably rather than reacting to panic-inducing midnight emergencies.
This comprehensive guide breaks down practical, cost-effective strategies for preserving your home’s infrastructure. From simple weekend inspections to managing major mechanical equipment and navigating trade services, following these step-by-step practices will keep your hard-earned money in your bank account while protecting your home.
Step 1: Performing Routine Visual Checks and DIY Drain Care
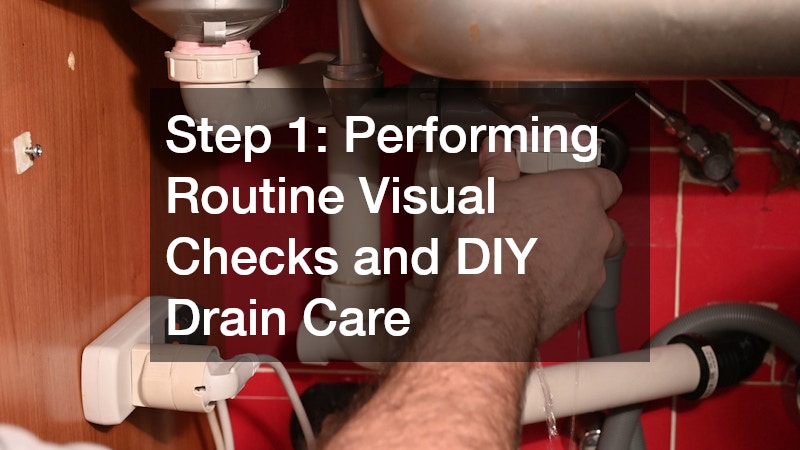
The first line of defense against excessive home repair expenses is early detection. Developing a habit of conducting quick, monthly visual walk-throughs across your home allows you to catch minor seepage, loose fittings, or subtle corrosion long before they cause major structural failure.
Start by systematically inspecting every exposed water connection in your living space:
- Under-Sink Cabinets: Open kitchen and bathroom vanities to check supply lines, shutoff valves, and P-traps. Look for damp wood, flaking finish, or mineral crusting around threaded connections.
- Toilet Supply Lines: Inspect the flexible braided hoses connecting the wall angle stop to the toilet tank. Plastic nuts can crack over time, and older rubber hoses should be replaced with stainless steel braided options.
- Water Meter Test: Turn off all water fixtures inside and outside the home, then check your main water meter. If the leak indicator dial is spinning or the digital numbers are changing, you have a hidden leak inside a wall or beneath the slab.
- Appliance Hoses: Check washing machine and dishwasher fill lines for bulges, cracks, or loose clamps.
When it comes to daily sink and tub usage, preventative care keeps drains flowing freely without relying on harsh chemical cleansers. Commercial liquid clog removers rely on caustic acids that generate extreme heat inside your pipes. Over time, this chemical reaction weakens plastic joints, corrodes vintage metal drains, and melts pipe adhesives, leading to hidden leaks inside walls.
Instead, invest a few dollars in plastic drain hair catchers for shower basins and tub drains. For minor kitchen sink slowdowns, clear organic buildup using a hand-cranked drain auger or a mixture of hot water, baking soda, and vinegar. Taking a hands-on approach to basic residential plumbing care saves you money on supplies while preventing catastrophic pipe degradation. Whenever minor fixtures develop persistent drips, taking time to replace internal O-rings, washers, or cartridges yourself handles minor plumbing repairs for a fraction of the cost of a full fixture replacement.
Step 2: Clearing Stubborn Mainline Clogs Cost-Effectively
While small fixture clogs can usually be cleared with a manual plunger or hand snake, main sewer line blockages require a more robust solution. Mainline backups occur when hair, soap scum, grease, mineral scale, and tree roots accumulate inside the primary drain pipe running beneath your home or yard. When this critical pipe becomes constricted, wastewater has nowhere to go and will back up into your lowest fixtures, such as basement floor drains or ground-floor shower stalls.
Ignoring early warning signs—such as gurgling toilets when the washing machine drains or simultaneous backups across multiple bathrooms—can lead to thousands of dollars in sewage cleanup costs. When standard snaking fails to restore proper flow or only punches a small temporary hole through a thick blockage, alternative clearing methods must be considered.
For heavy, grease-heavy, or heavily scaled sewer lines, high-pressure water blasting—commercially known as drain jetting—is the most thorough restoration method available. Unlike traditional mechanical snakes that simply poke through debris, high-pressure water streams scour the full inner circumference of the pipe, flushing away years of compacted sludge, roots, and mineral deposits.
Utilizing specialized drain services for intense hydro-jetting may carry a higher upfront cost than basic mechanical snaking, but it delivers far greater long-term value. By restoring the pipe to near-original capacity, you eliminate recurring blockages and avoid paying for repeated monthly service calls.
Step 3: Extending the Lifespan of Water Heating Systems

Water heaters are among the most energy-intensive and expensive appliances in any residence. Because these systems operate continuously under high pressure and elevated temperatures, they are particularly vulnerable to internal corrosion and efficiency loss. Without regular upkeep, hard water minerals settle at the bottom of the tank, creating an insulating layer of scale that forces the heating element or burner to work significantly harder, dramatically shortening the unit’s operating life.
Flushing your tank annually is a straightforward task that preserves heating efficiency and lowers monthly utility bills:
- Turn Off Power/Gas: Always disconnect electrical circuit breakers or set gas valves to “Pilot” before draining the tank.
- Attach a Hose: Connect a standard garden hose to the drain valve located near the base of the tank and run the opposite end to a floor drain or outdoor area.
- Flush the Sediment: Open the drain valve and allow the water to discharge until it runs completely clear of sandy sediment or rusty flakes.
- Refill Before Powering: Ensure the tank is completely full of water and air is bled from household faucets before restoring power or gas.
In addition to annual flushing, protecting the mechanical components of your hot water heater involves checking the sacrificial anode rod every two to three years. This metal rod hangs inside the tank and intentionally attracts corrosive elements in the water, sacrificing itself to prevent the steel tank walls from rusting. Replacing a spent anode rod costs very little in parts and can double or triple the overall lifespan of the appliance.
Taking time to perform simple preventative checks or scheduling routine water heater services ensures your system runs safely, maintains peak energy efficiency, and avoids sudden tank ruptures that flood surrounding living spaces.
Step 4: Knowing When to Hire Certified Trade Professionals
While DIY maintenance works wonders for minor tasks, knowing your technical limits is essential for keeping home improvement budgets under control. Taking on complex installations without proper tools, diagnostic equipment, or trade experience often leads to botched installations, code violations, and costly secondary damage that invalidates homeowner insurance policies.
Major installations, structural pipe rerouting, gas line connections, and main sewer replacements should always be left to certified trade workers. Hiring experienced plumbing contractors guarantees that critical work complies with national and local building codes. These professionals possess specialized diagnostic gear—such as inline fiber-optic video cameras and hydrostatic pressure testers—that can pinpoint underground leaks or collapsed pipes without damaging your lawn or slab.
When evaluating professional options for major renovations or emergency overhauls:
- Verify Credentials: Ensure the business holds active state licensing, general liability insurance, and workers’ compensation coverage.
- Request Detailed Estimates: Demand written, itemized quotes that separate material costs from labor charges rather than relying on verbal estimates.
- Compare Project Scope: Seek at least three independent quotes for high-ticket projects, ensuring each bidder is estimating against the exact same project specifications.
- Ask About Warranties: Choose companies that stand behind their installation work with written labor and parts warranties.
Paying for licensed plumbing services for complex structural jobs protects your home’s resale value and guarantees the work is done right the first time, preventing expensive rework down the road.
Step 5: Designing Functional Utility Areas to Prevent Leaks
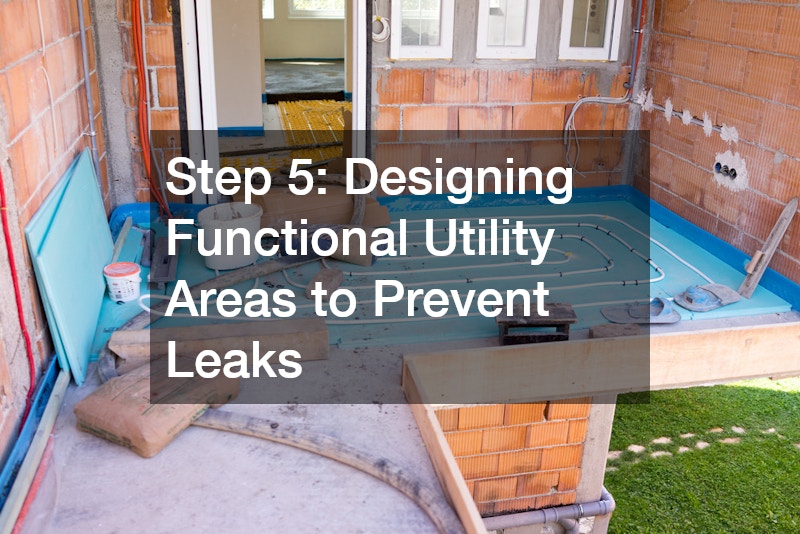
Beyond checking individual fixtures and pipes, the physical organization and layout of your utility areas directly impact how easy—and cheap—it is to maintain your home. Cramped, dark, or cluttered utility closets make it difficult to spot slow leaks or access shutoff valves during a sudden mechanical failure.
Organizing these zones around access and safety minimizes secondary damage when components eventually fail:
- Clear Valve Access: Keep a clear, unobstructed path to your main water shutoff valve, water heater, and water softener. Label key shutoffs with brightly colored tags so family members can locate them instantly in an emergency.
- Install Drain Pans: Place corrosion-resistant drain pans beneath washing machines and water heaters, routing the pan’s discharge line to an active floor drain or exterior wall.
- Elevate Floor Items: Store boxes, tools, and household items off the basement floor using heavy-duty plastic shelving to prevent water damage from minor seepage.
- Add Flood Sensors: Place inexpensive, battery-operated wireless water alarms on the floor near major water-using appliances to alert you the moment moisture is detected.
Designing utility spaces with maintenance in mind ensures that minor drips are noticed immediately, allowing you to handle small repairs before water migrates into surrounding drywall, subflooring, or framing.
Step 6: Integrating Smart Monitoring and Pressure Controls
Excessive water pressure is a silent killer of household pipe systems. While strong shower pressure feels refreshing, municipal water supplies often push water at pressures exceeding 80 to 100 pounds per square inch (PSI). Continuous high pressure strains pipe joints, wears out internal appliance valves, causes water hammer, and dramatically increases the likelihood of pinhole leaks.
Installing and monitoring a Pressure Reducing Valve (PRV) on your main water line protects your entire system:
- Optimal Range: Maintain household water pressure between 40 and 60 PSI using a standard pressure gauge attached to an outdoor hose bib.
- PRV Adjustments: If pressure exceeds 70 PSI, adjust your home’s PRV or have a professional adjust it to safeguard internal fixtures.
- Smart Shutoff Systems: Consider installing an automated mainline shutoff valve that monitors water flow patterns using smart sensors. These systems automatically shut off the main supply if an abnormal continuous flow—such as a burst pipe—is detected while you are away from home.
By maintaining optimal pressure levels, you also enhance the overall efficiency of your systems, leading to improved performance and a longer lifespan of your equipment. Additionally, proper pressure management can help prevent costly breakdowns and reduce maintenance expenses over time.
Step 7: Reducing Emergency Service Fees and Call-Out Costs

When professional intervention becomes unavoidable, strategic scheduling makes a massive difference in the final bill. Emergency service calls made during nights, weekends, or major holidays usually carry steep dispatch premiums, hourly surcharges, or flat emergency call-out fees that double or triple standard labor rates.
To keep service expenses manageable:
- Bundle Non-Urgent Tasks: Keep a running list of minor issues—such as a slightly running toilet, a loose faucet handle, or a slow kitchen drain. Schedule a single routine service visit to address everything at once, paying only one trip fee.
- Use Off-Peak Scheduling: Whenever possible, schedule maintenance visits during standard business hours on Tuesday, Wednesday, or Thursday, when service schedules are typically less congested.
- Know Your Shutoff: If a leak develops outside business hours, turn off the fixture’s local shutoff valve or the home’s main water valve to stop the water flow. This buys you time to call during normal working hours rather than paying emergency rates.
Establishing a relationship with trusted local plumbers before a crisis strikes allows you to secure fair, predictable pricing. Reliable neighborhood technicians value long-term client relationships and are far more likely to offer upfront pricing, honest advice, and priority scheduling to repeat local customers. Taking time to research independent local plumbers in your area ensures you have a dependable contact ready when major repairs or routine inspections are required.
Taking control of your home’s plumbing health does not require huge financial investments or complex trade skills. By executing regular visual checks, avoiding harsh chemical drain openers, servicing water heating equipment, controlling water pressure, and forming strategic partnerships with qualified local trade professionals, you can protect your property from devastating water damage while keeping your long-term maintenance costs remarkably low.